
How to download and install a trial License
Create a trial license in Chrovia Console, download the Chrovia browser, install the License, and verify that the License is working from a bundled extension.
This guide is for developers trying the browser capabilities in Chrovia SDK. You need two downloads: a Chrovia License file and the Chrovia browser archive for your operating system. Installing the License means copying that file into the browser's designated folder, not double-clicking it.
This walkthrough uses macOS. UI labels may vary with your language settings. For Persona Hub installation or subscriptions, use the Getting Started guide.
1. Create a trial license
Sign in to Chrovia Console, click Create license in the sidebar, and select Trial under License type.
Trial licenses currently last 30 days and include a 200-hour monthly quota. Each account can hold up to 1 active trial license at a time. After creation, the license card shows its exact expiration date and remaining quota.
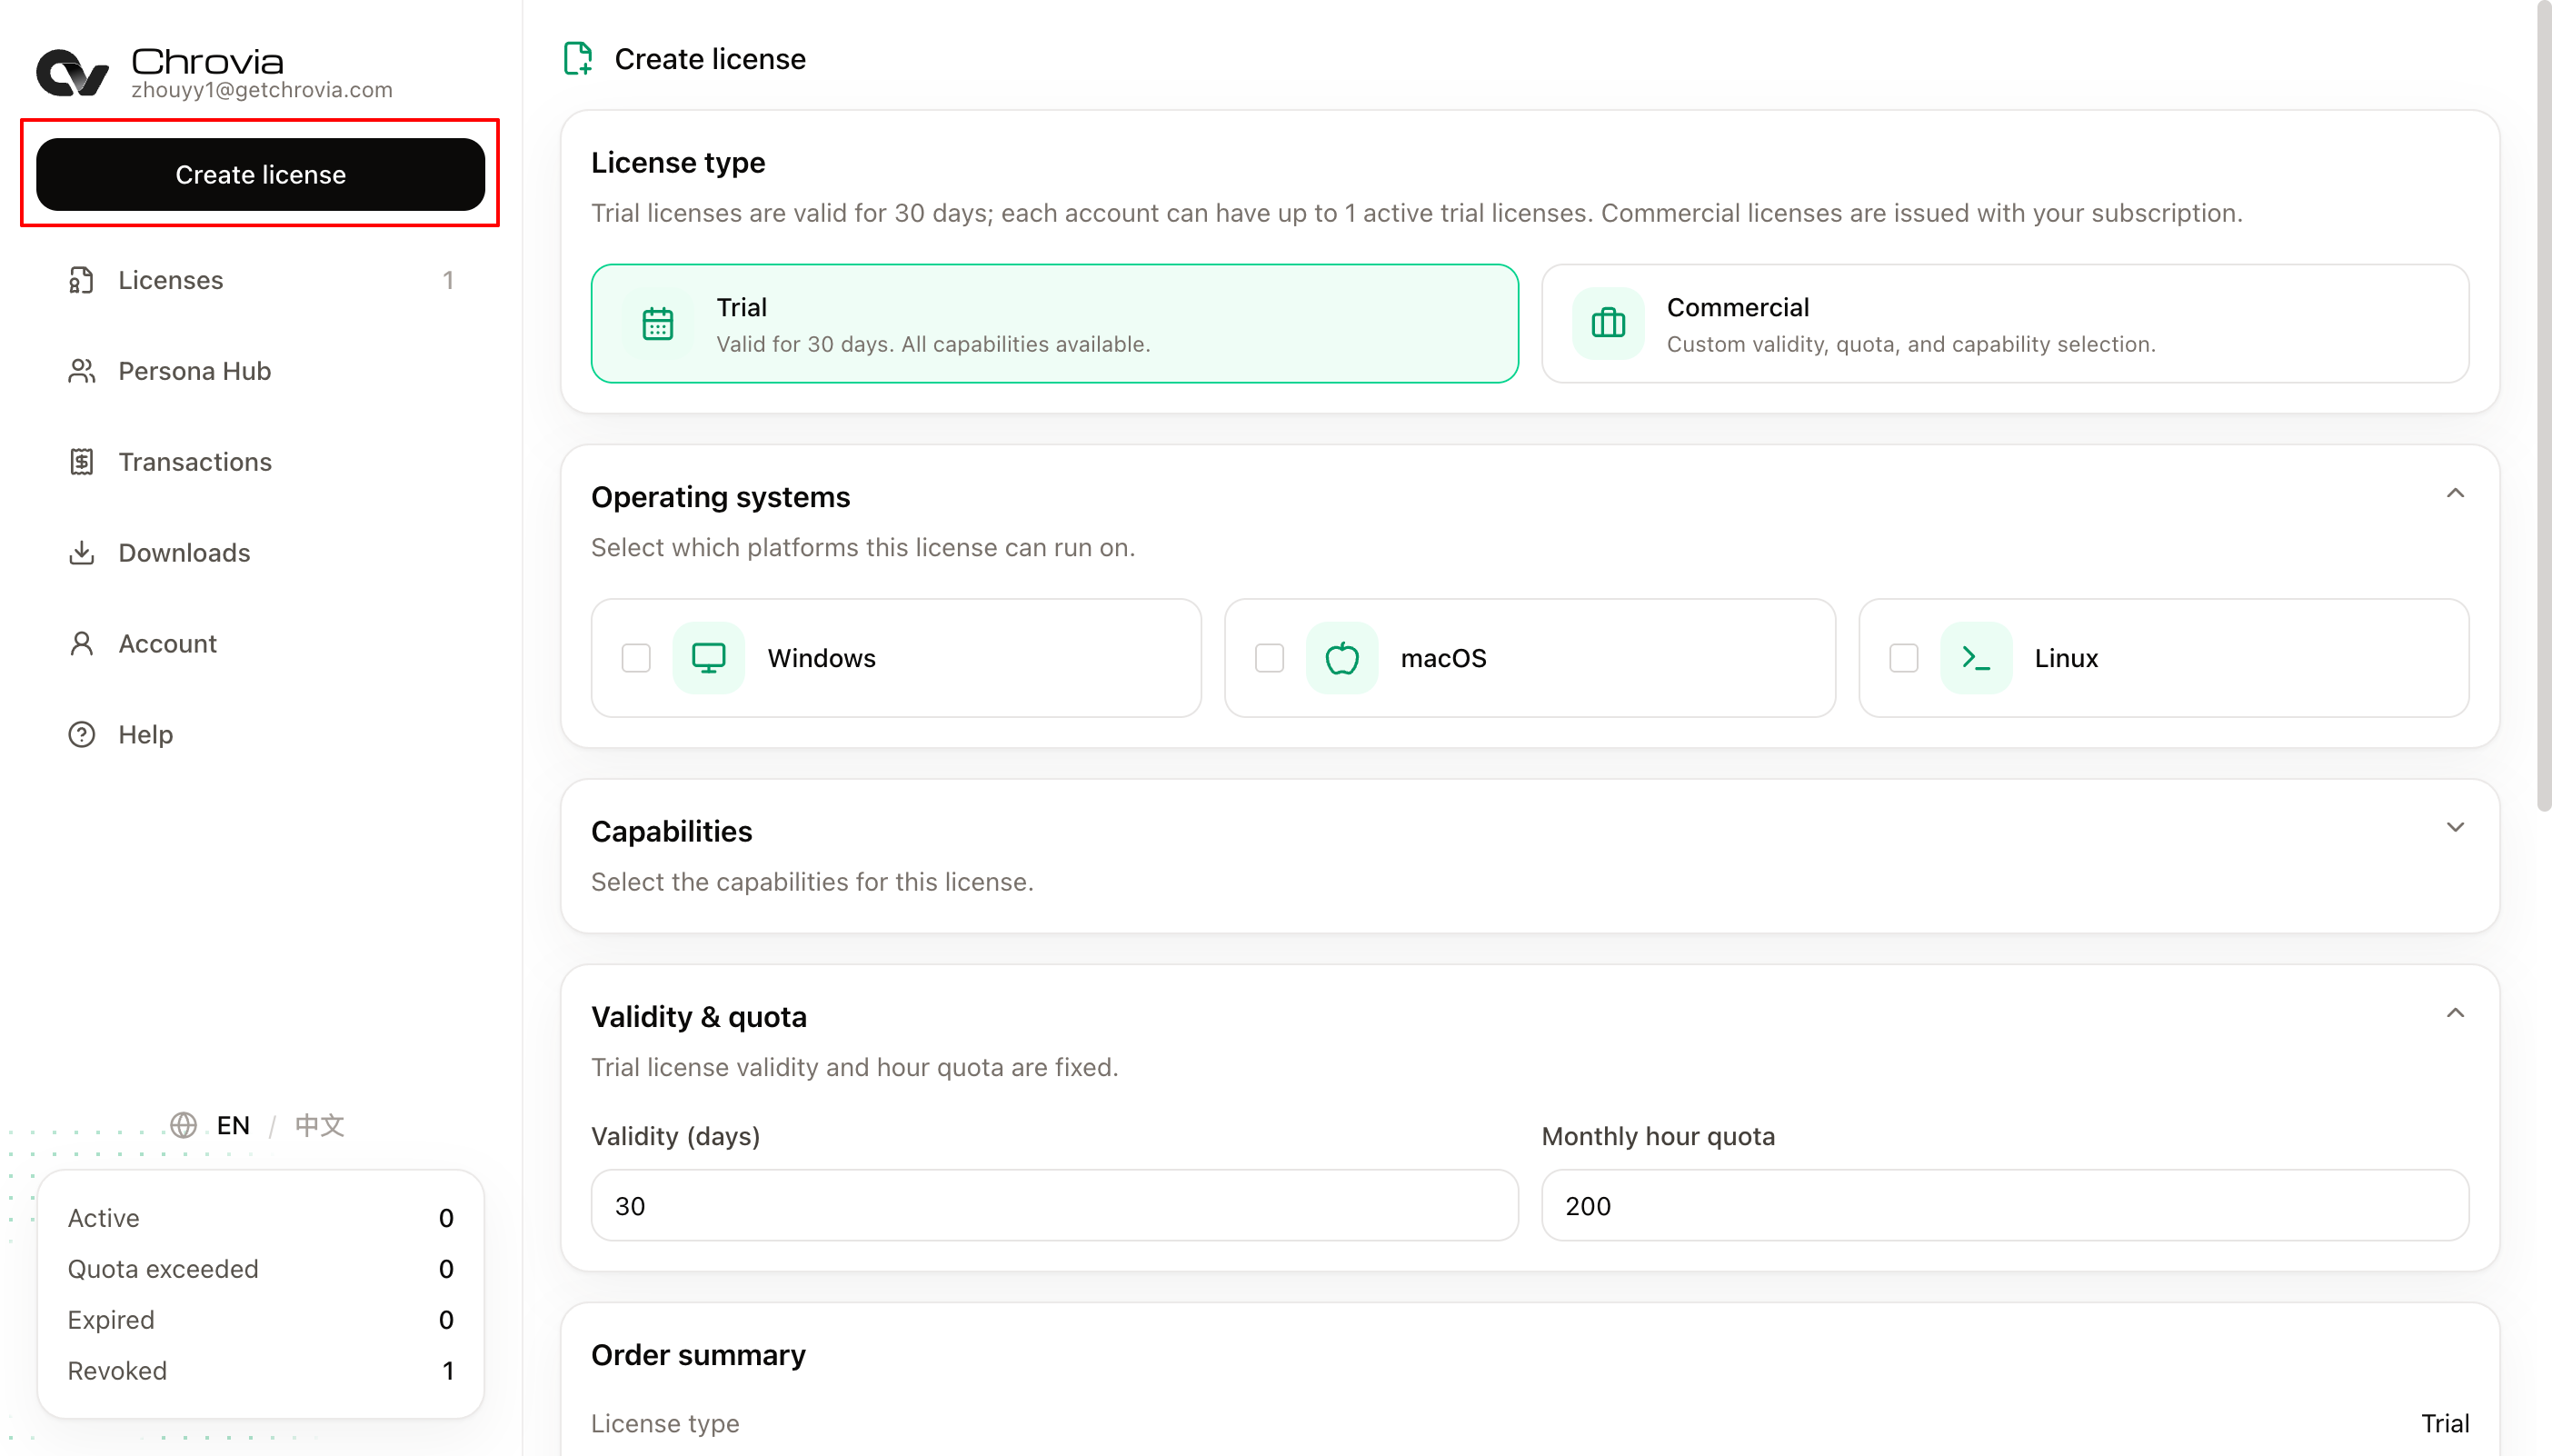
Under Operating systems, select the platforms where you plan to run the browser. The screenshot selects Windows and macOS. Select only macOS if you are testing on a Mac.
Expand Capabilities and select the capabilities to try. All capabilities are available for selection during the trial, but only those selected and issued in the License are authorized. Select Network Intercept to follow the example at the end of this guide.
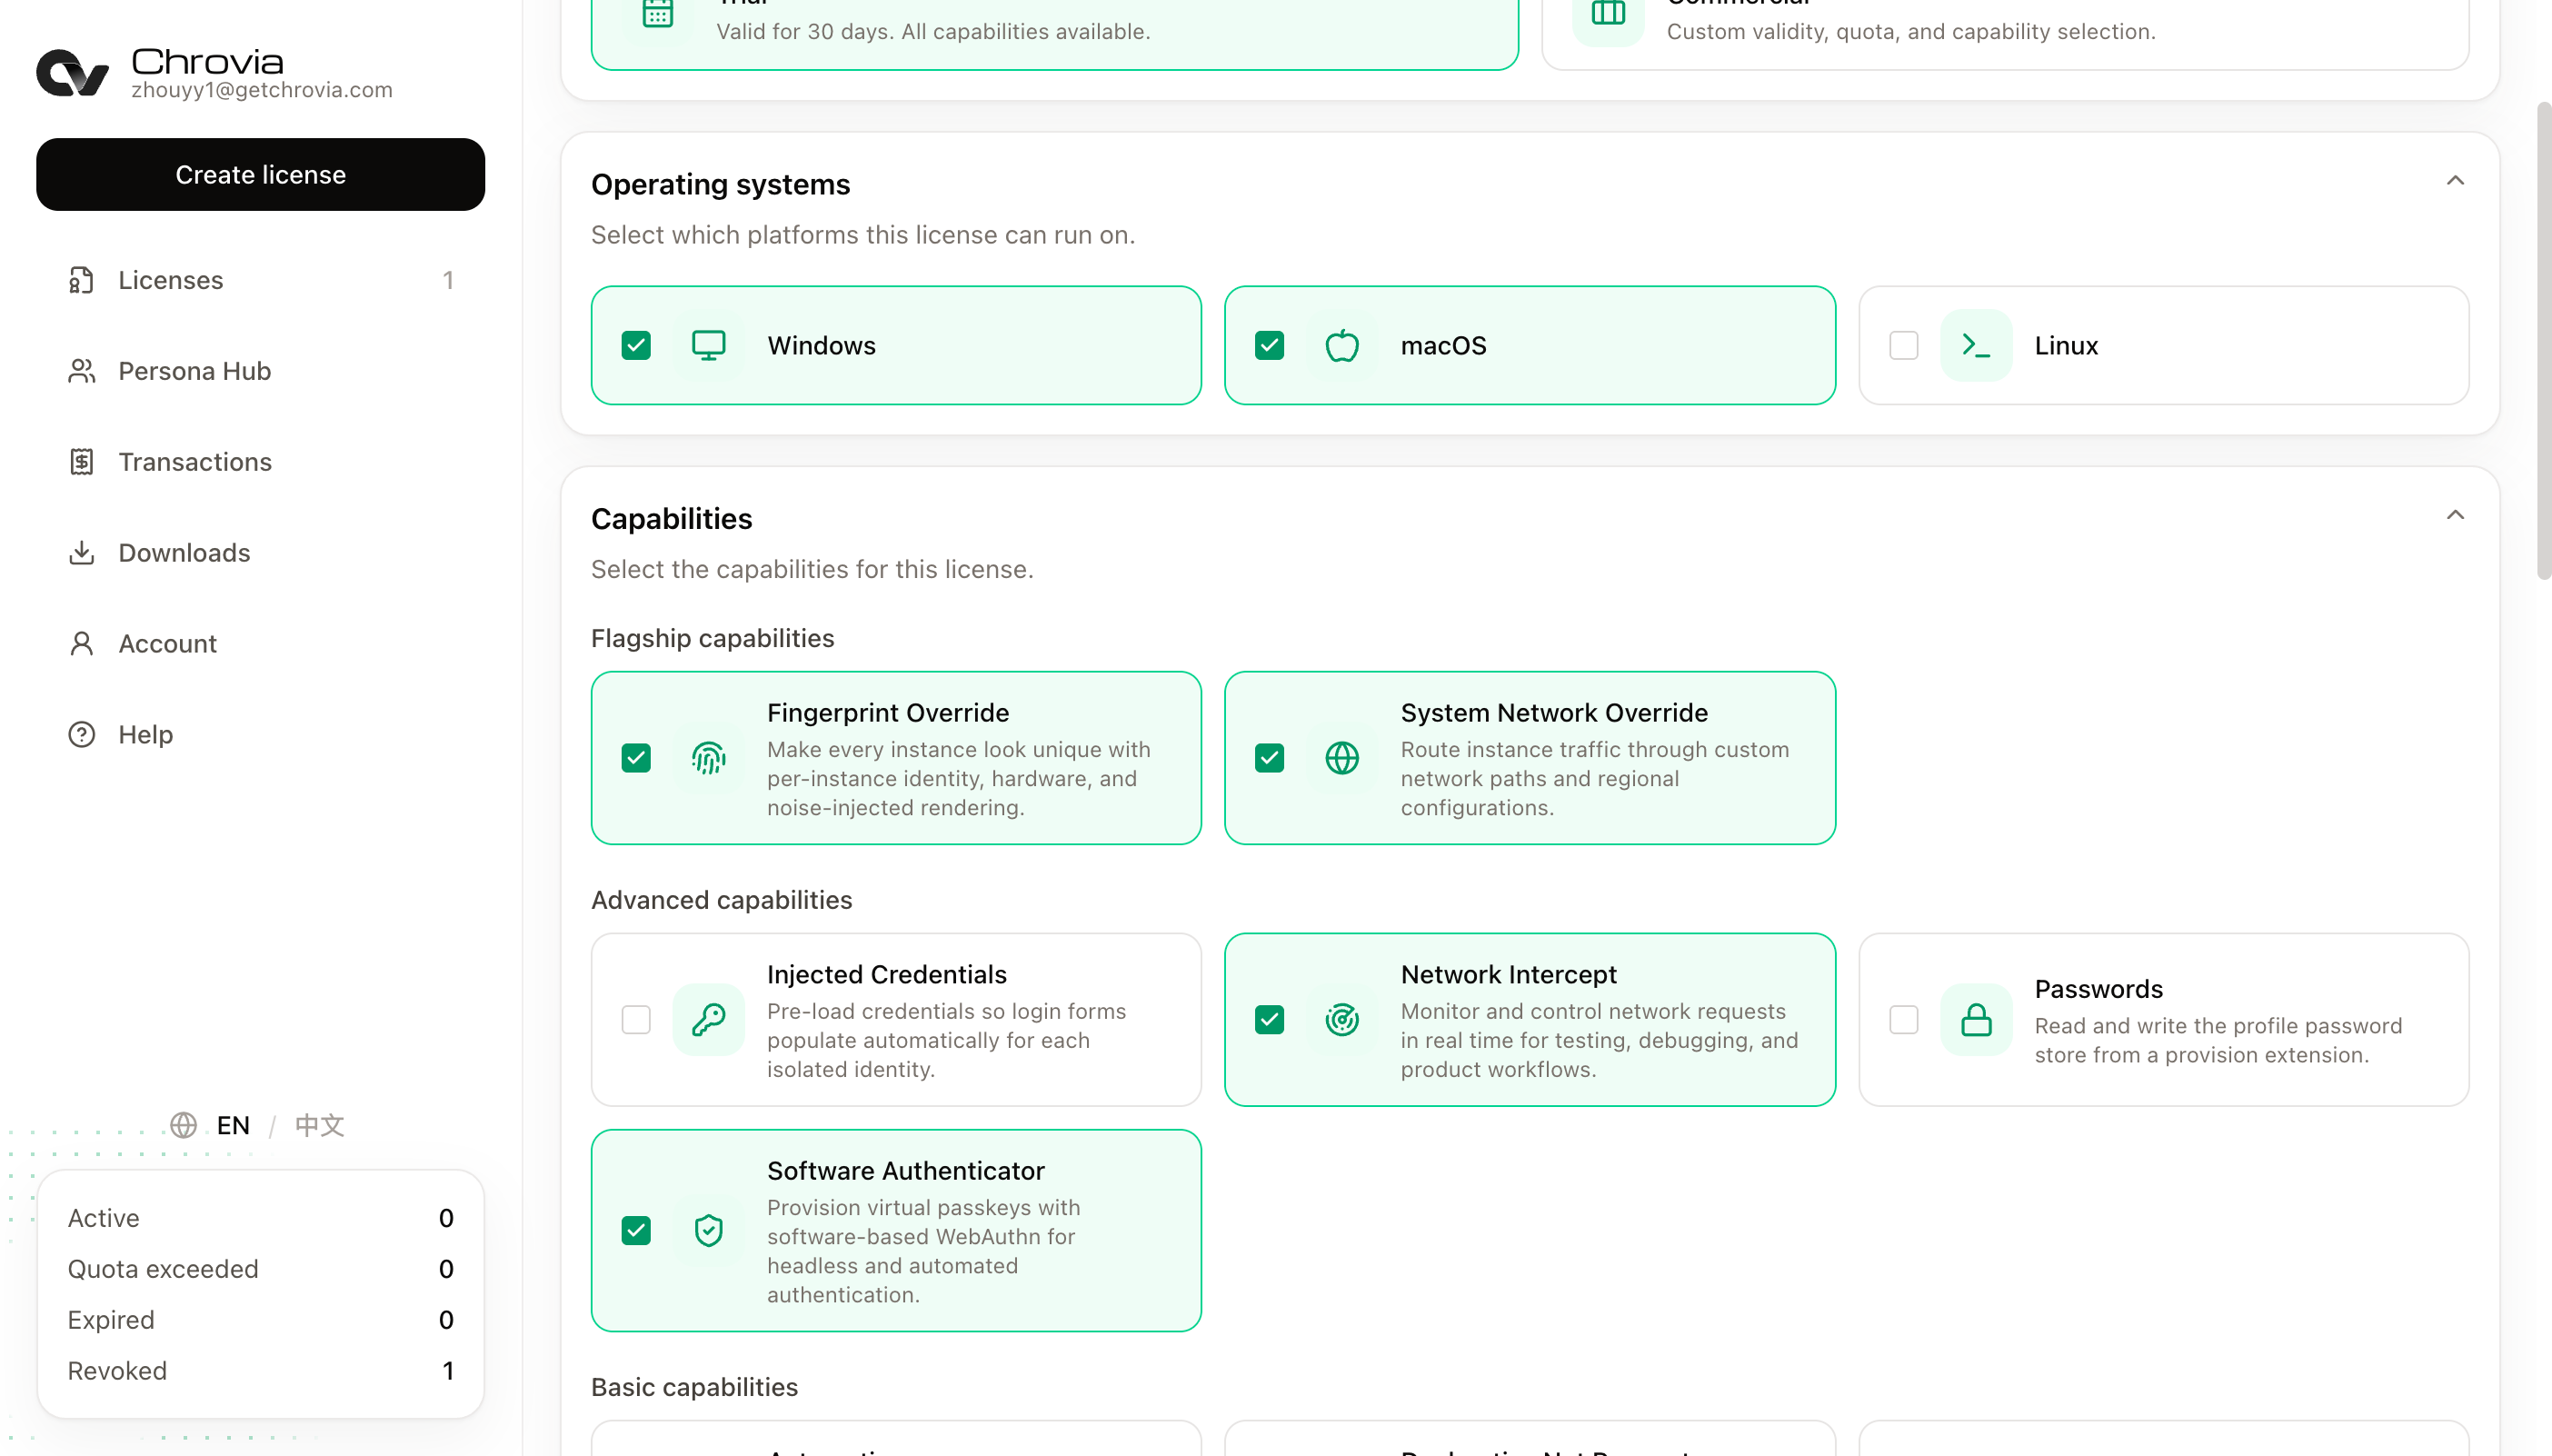
Review your choices, scroll to the bottom, and click Create license. Once the license is created, Console opens the license list.
2. Download the License file
On the Licenses page, find the trial license you just created with an Active status, then click Download on that card.
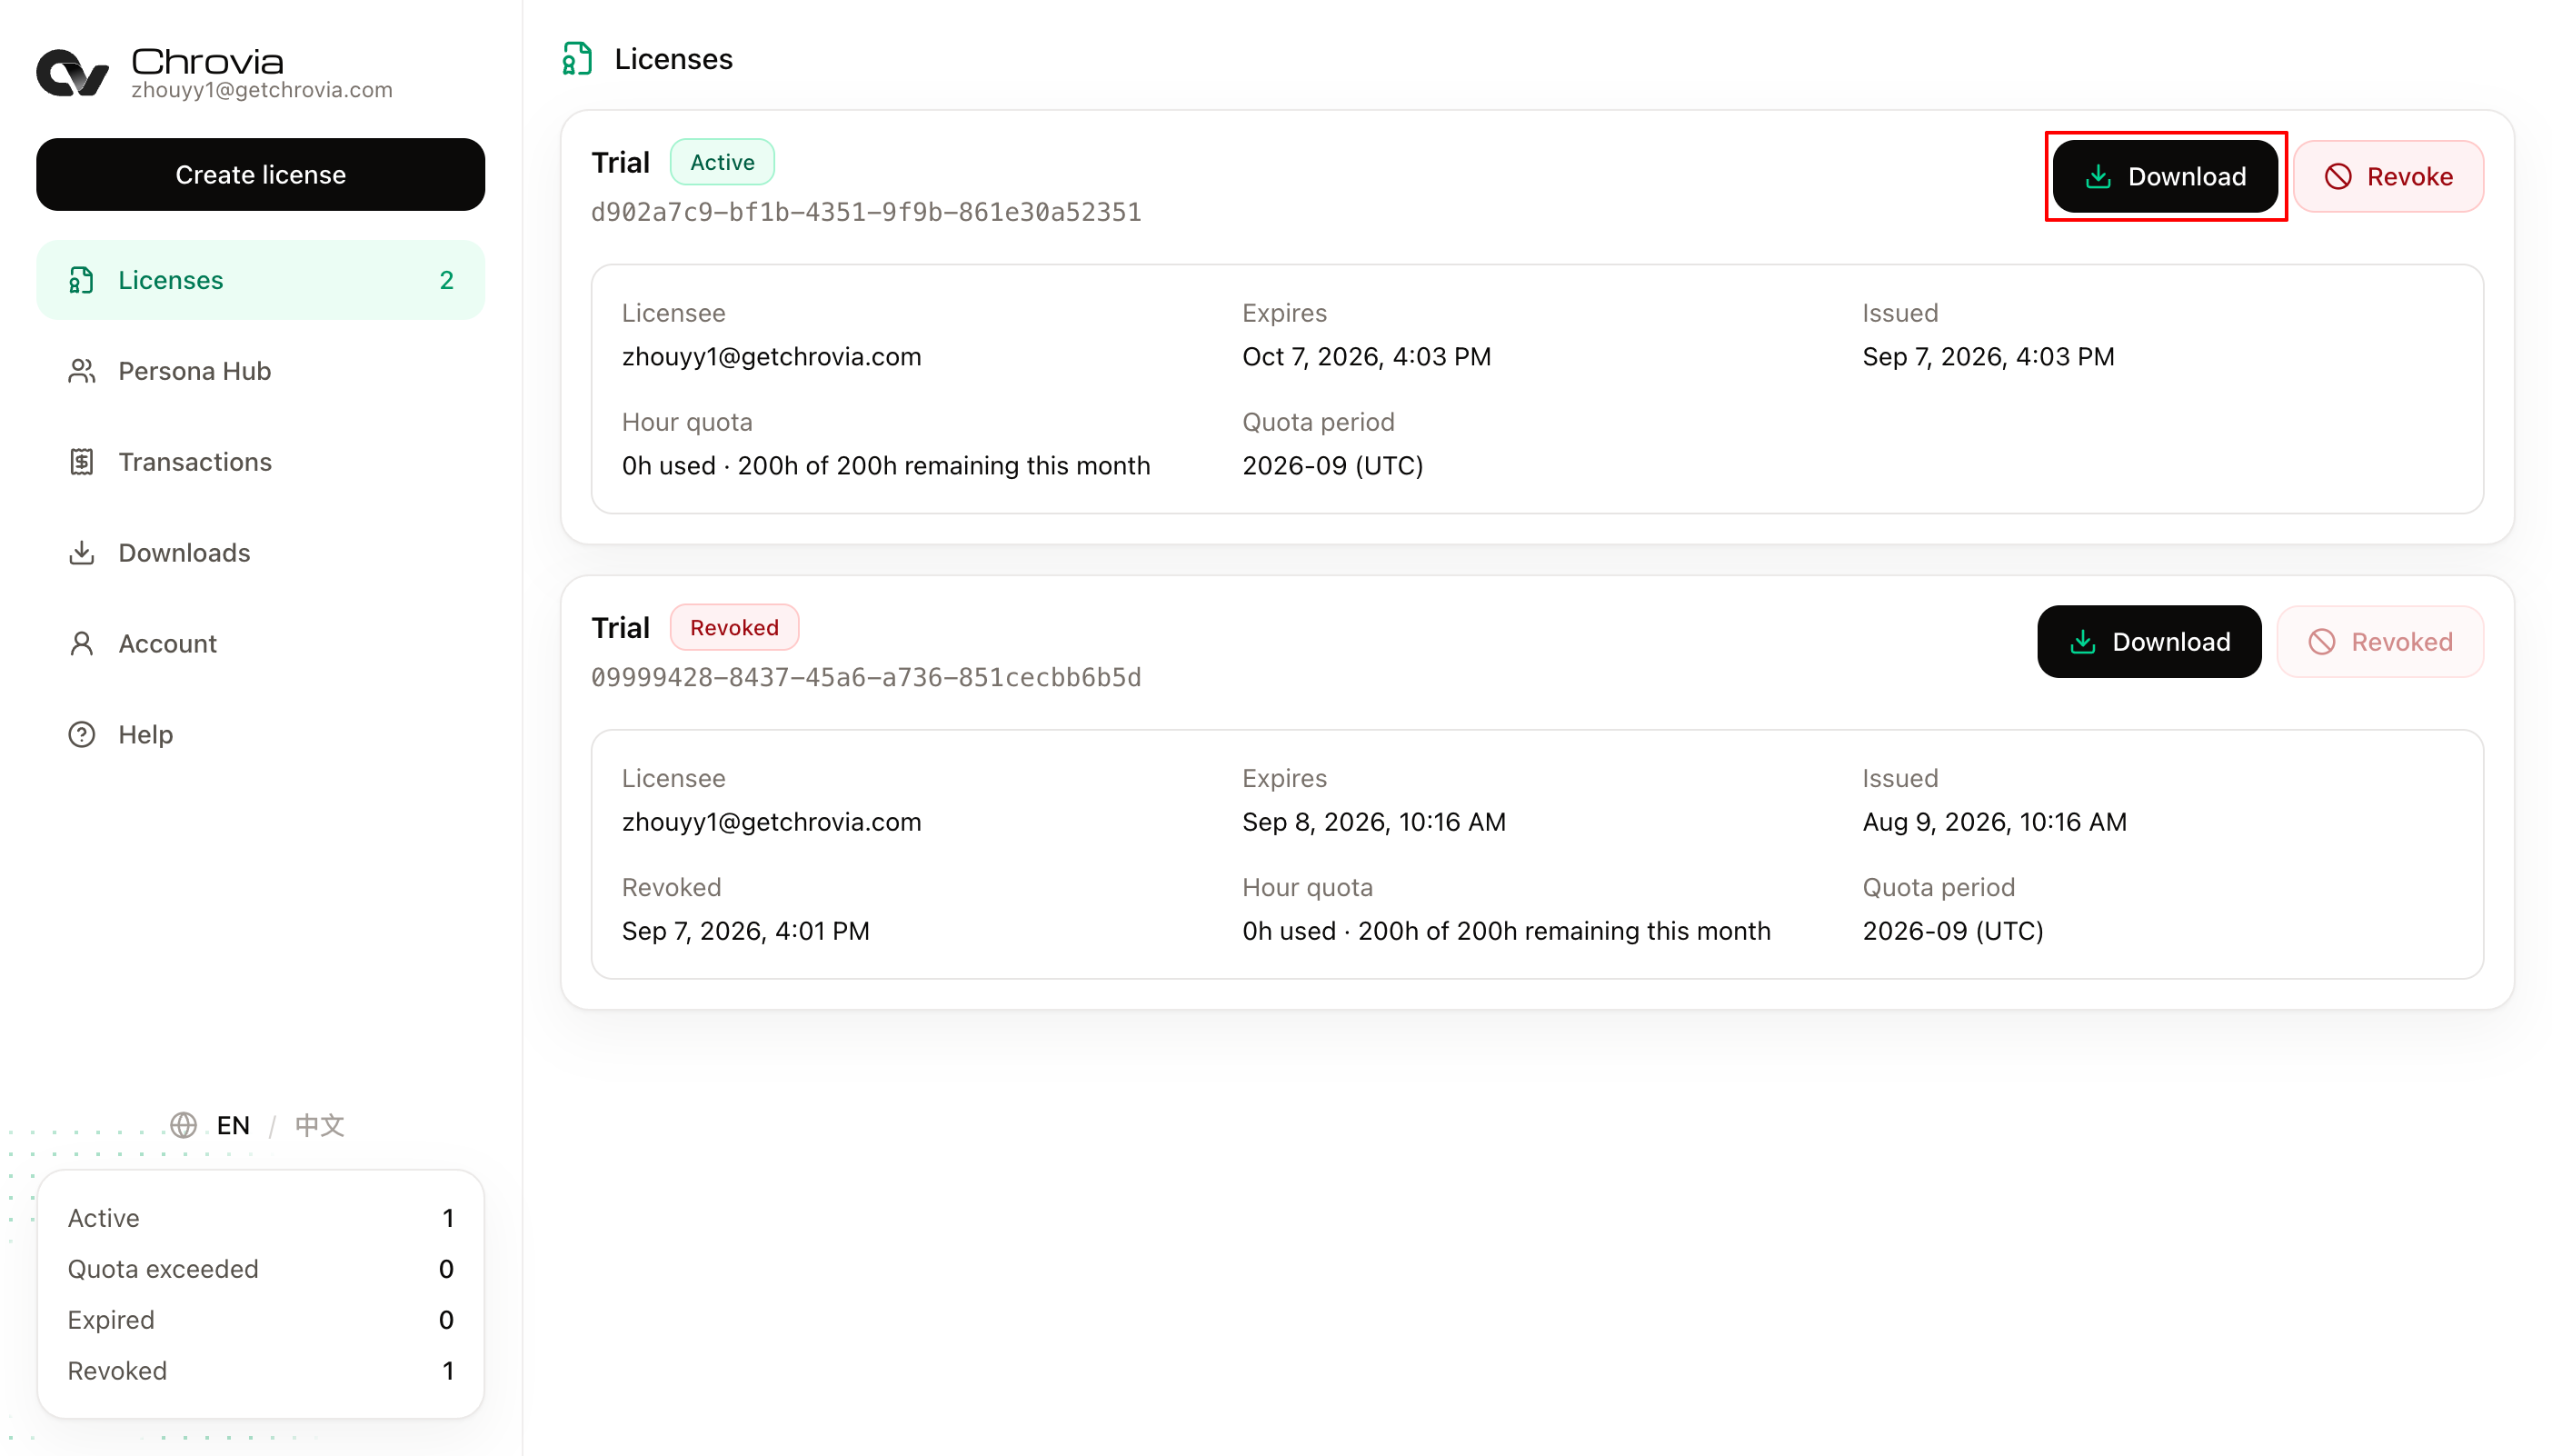
The downloaded file is named Chrovia License, with no file extension. Keep that name: do not add .json or .txt, or edit its contents. If a repeated download adds a number to the name, rename it back to Chrovia License before installing it.
3. Download and extract the browser
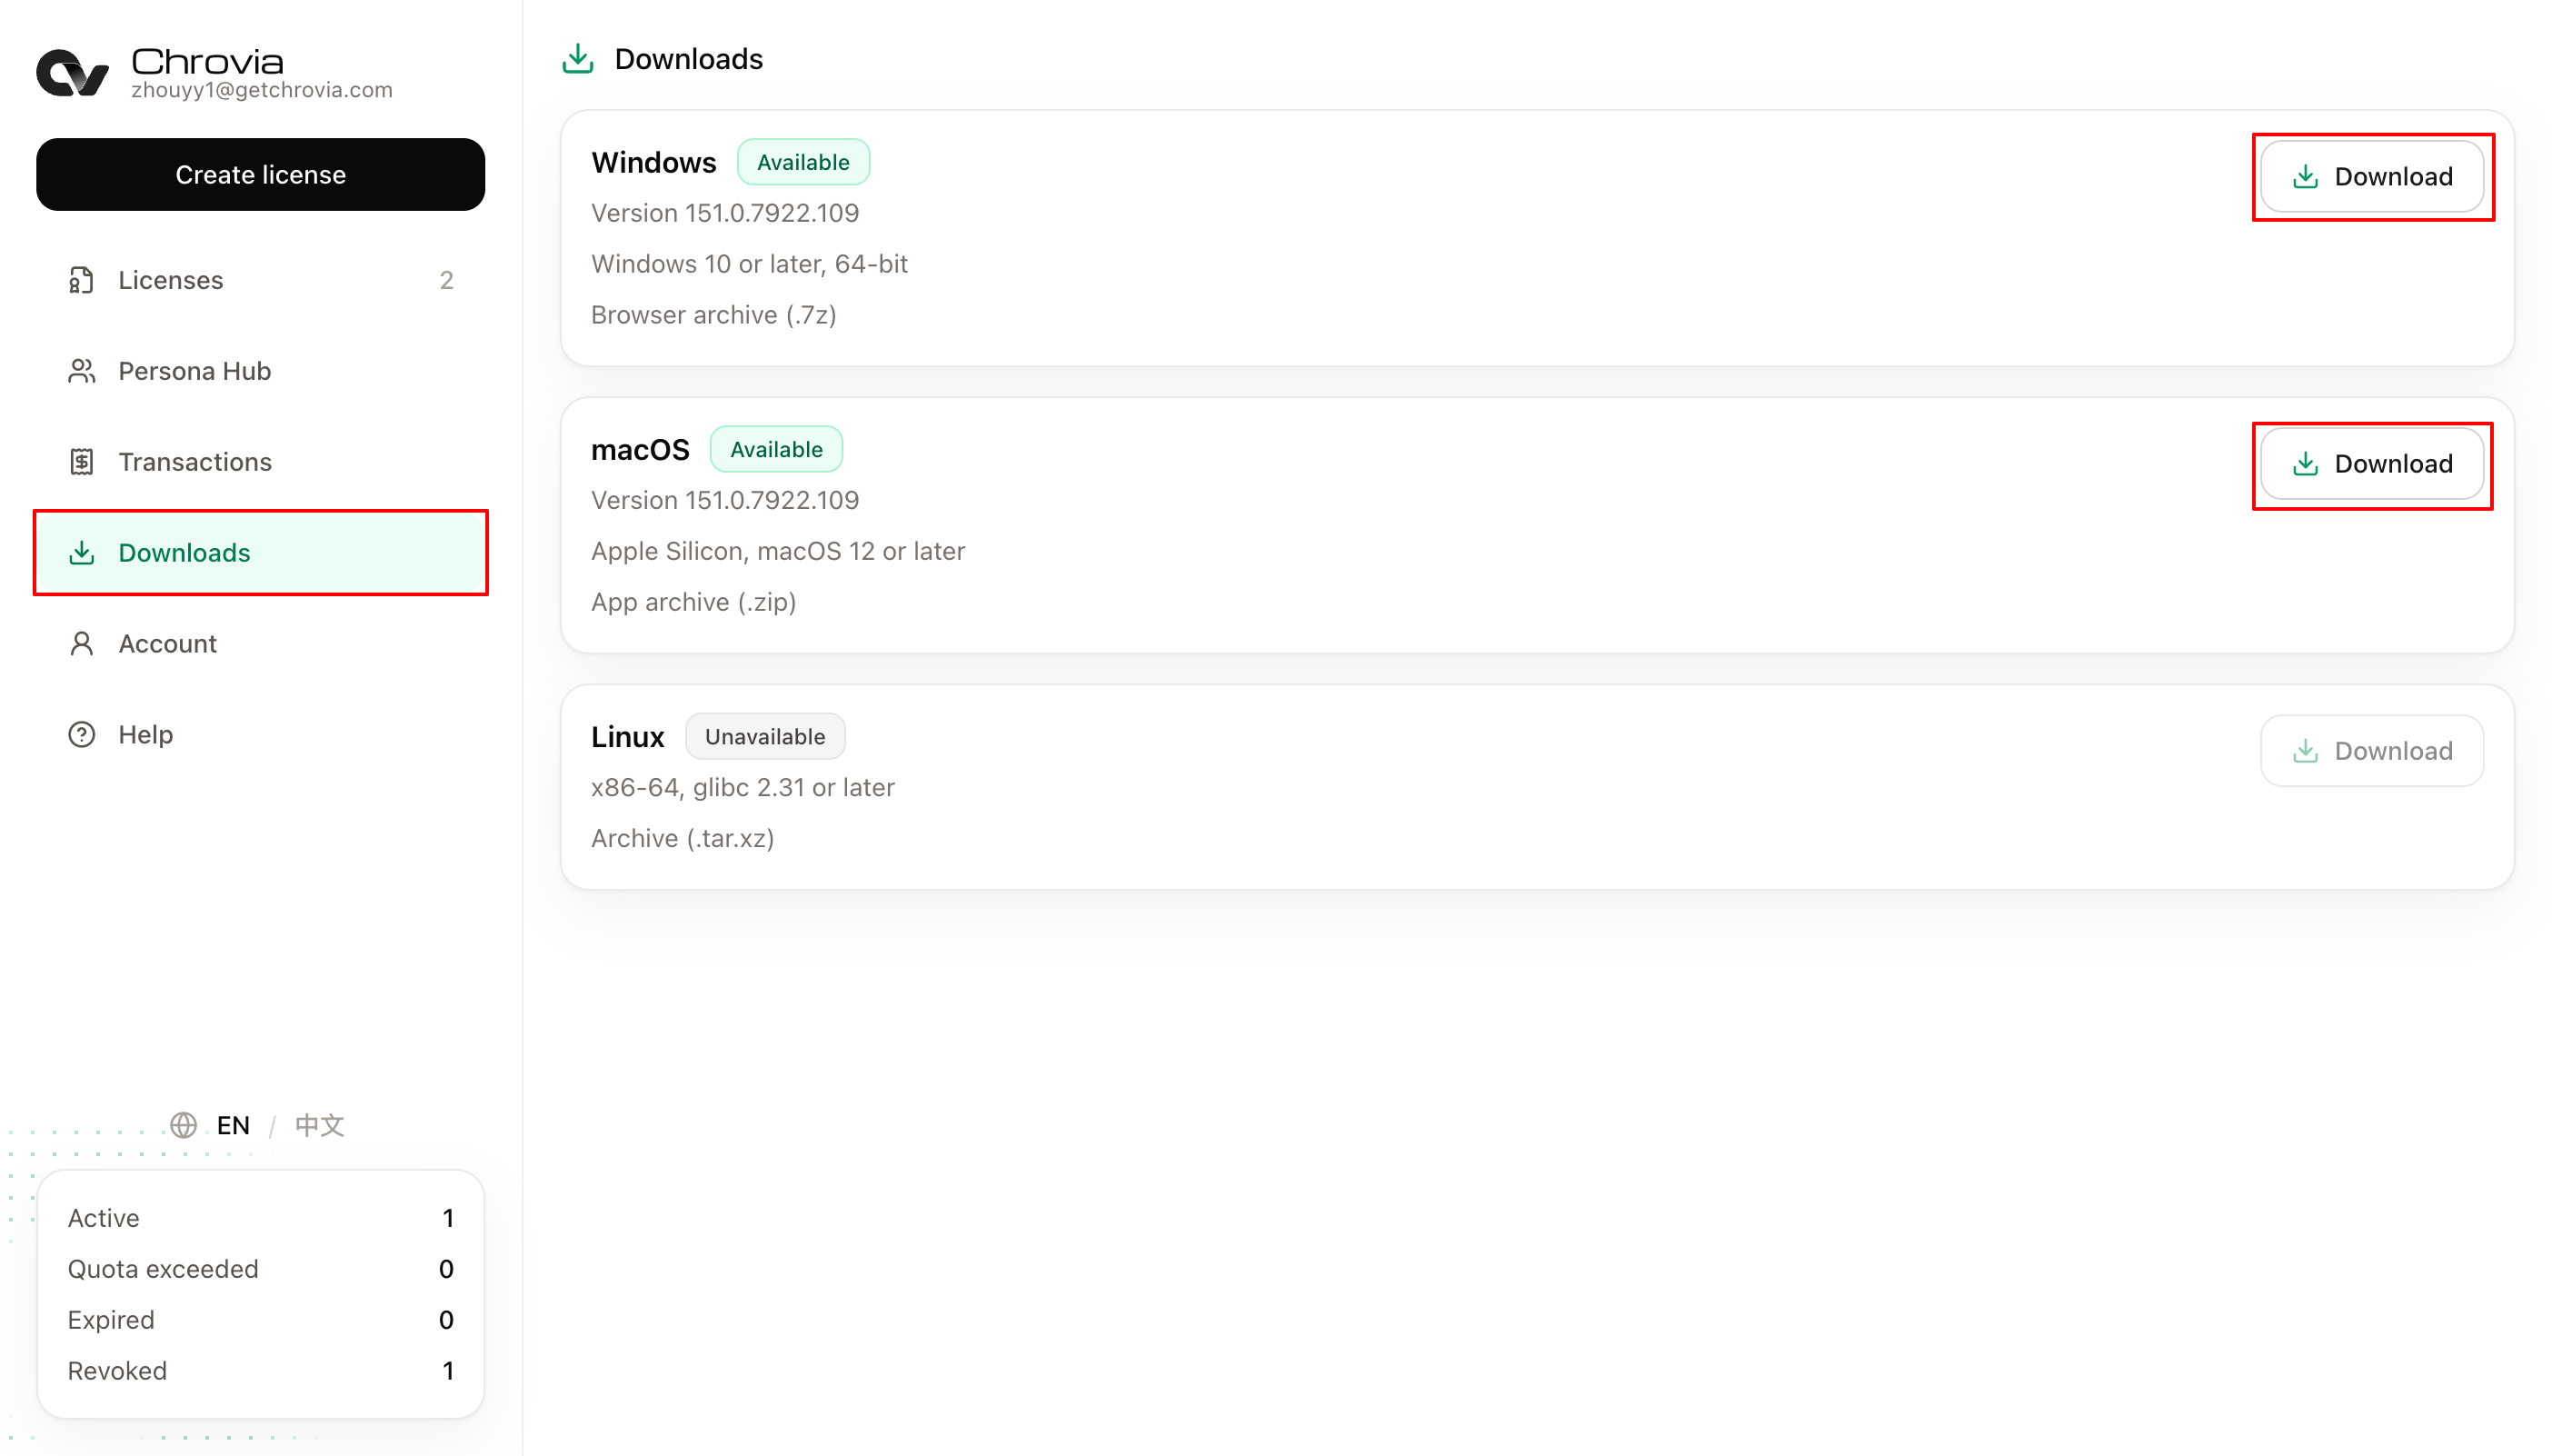
Click Downloads in the Console sidebar, then Download for your operating system.
- macOS: download the Apple Silicon
.ziparchive. Requires macOS 13 or later. - Windows: download the 64-bit
.7zarchive. Requires Windows 10 or later. - The Linux build is Unavailable in the screenshot. Check the page for current availability.
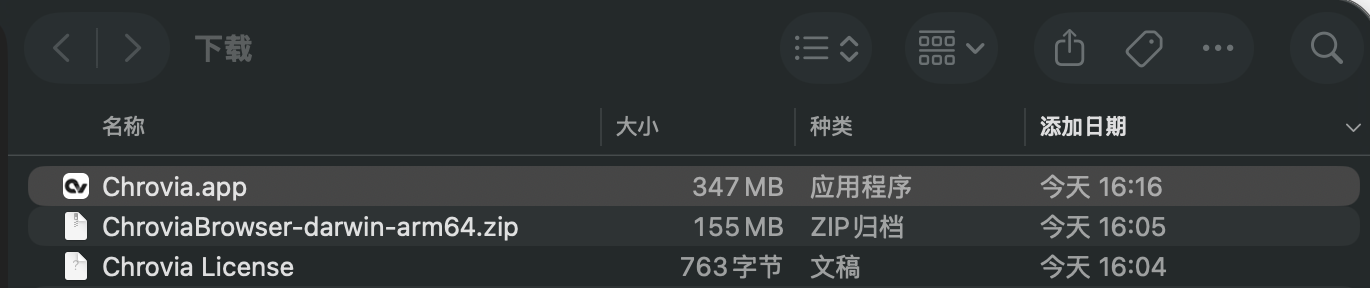
On macOS, extract ChroviaBrowser-darwin-arm64.zip to get Chrovia.app. The screenshot shows the app and Chrovia License in the Downloads folder. The commands below use that location too.
On Windows, extract the entire archive with a tool that supports .7z. Do not copy out just the executable.
4. Install the License
Fully quit any running Chrovia browser before copying the License file.
macOS
- In Finder, right-click
Chrovia.appand choose Show Package Contents. - Open
Contents, thenChrovia. - Copy the downloaded
Chrovia Licenseinto that folder, alongside theExtensionsfolder andmanifest.json.
The final path is:
Chrovia.app/Contents/Chrovia/Chrovia License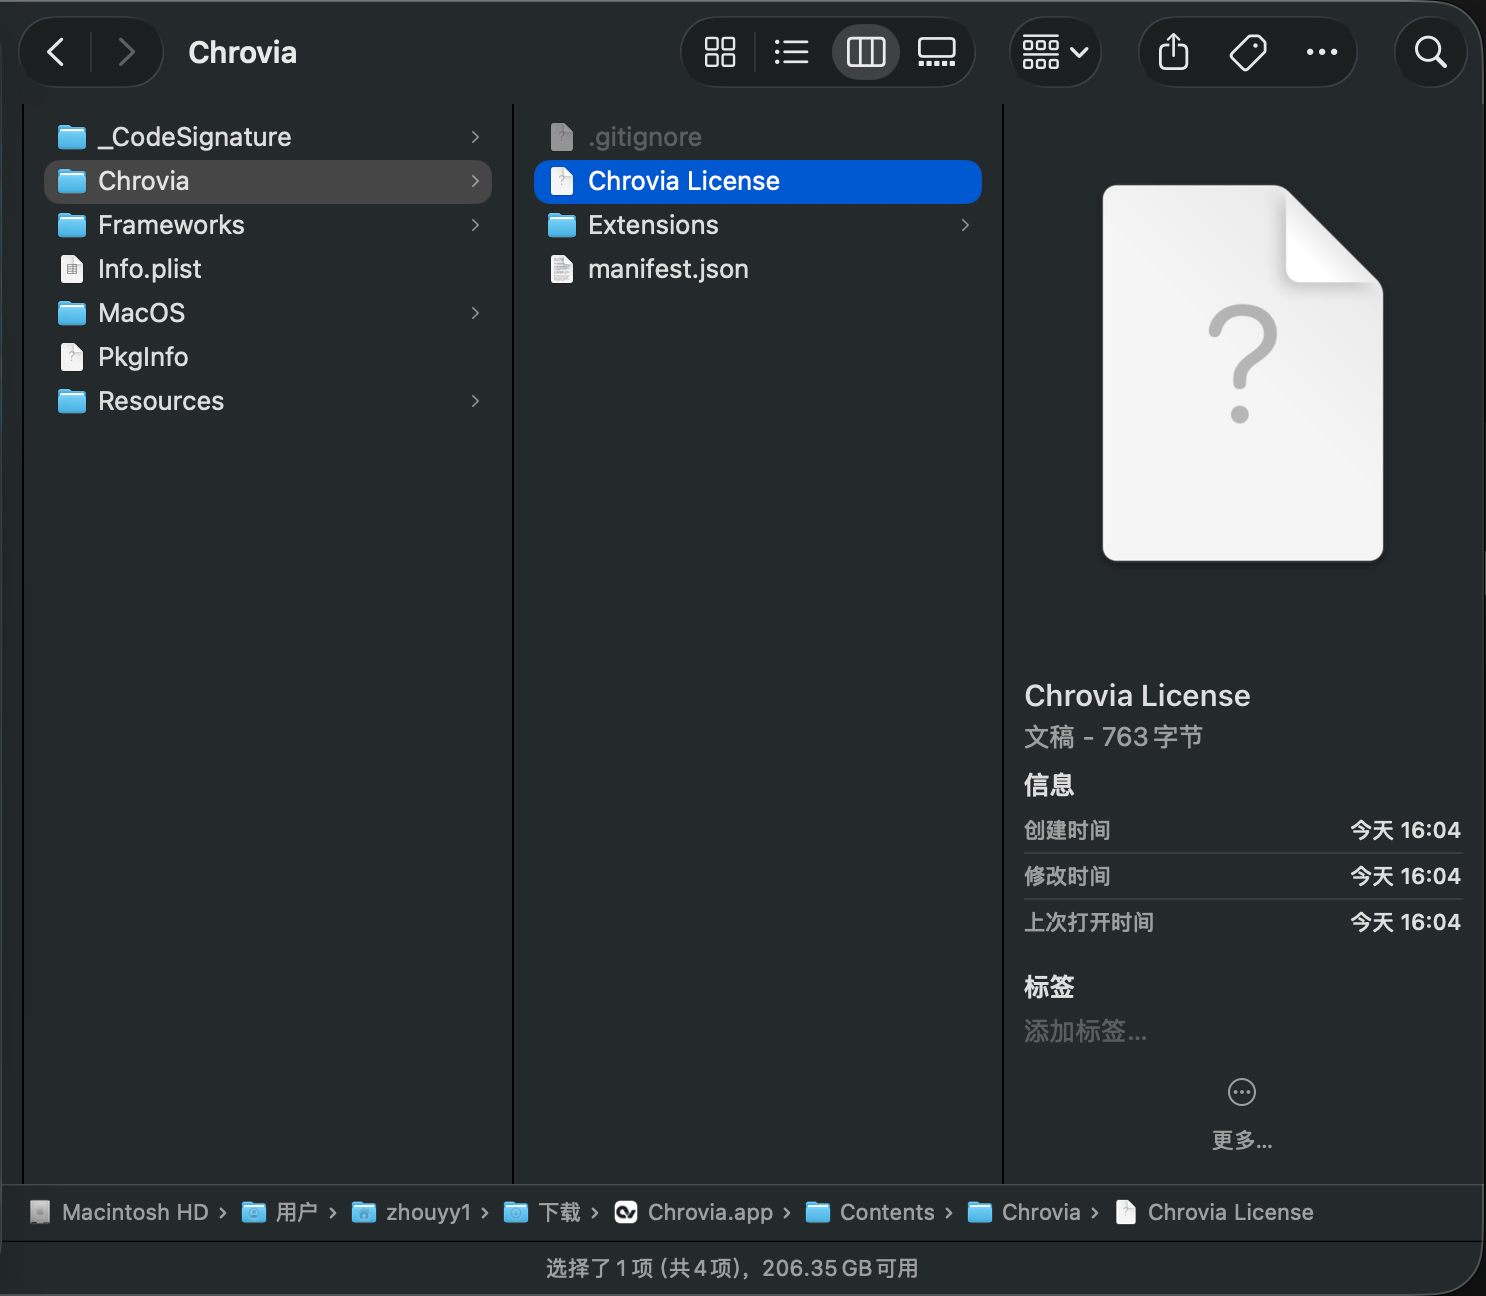
Do not put it in Contents/MacOS, Extensions, or an individual extension's folder.
Windows
Open the extracted browser directory and find the Chrovia folder next to the browser executable. Copy Chrovia License into that folder, alongside Extensions and manifest.json. Keep the filename without an extension.
Existing instance License
An existing Chrovia License in the user-data directory takes precedence over the installation file above, even when that instance file is invalid. If replacing the installation License has no effect, open chrome://version to locate the Profile Path; for a normal Default profile, its parent is the user-data directory. Fully quit, then replace the License in that root directory, or remove only that License file if you intend to use the installation fallback. Do not delete the browser data directory. See License installation for dedicated --user-data-dir instances.
5. Launch the browser to verify the License
After installation, check the Network Intercept capability you selected to verify that the License is working. Launch the browser from a terminal with --show-component-extension-options so bundled component extensions appear on the extensions page and you can open their debugging console. This flag is for the verification steps below; it is not needed for normal browser use.
On macOS, open Terminal and run:
cd ~/Downloads
./Chrovia.app/Contents/MacOS/Chrovia --show-component-extension-options
If the app is elsewhere, adjust the path. Fully quit any existing Chrovia browser first so the command does not pass its arguments to an older, running process.

On Windows, open a terminal in the browser executable's directory and run that executable with the same flag.
Once the browser opens, visit chrome://extensions and enable Developer mode in the top-right corner. The screenshot shows bundled extensions including Chrovia Infra. The exact list depends on the extensions included in your download.
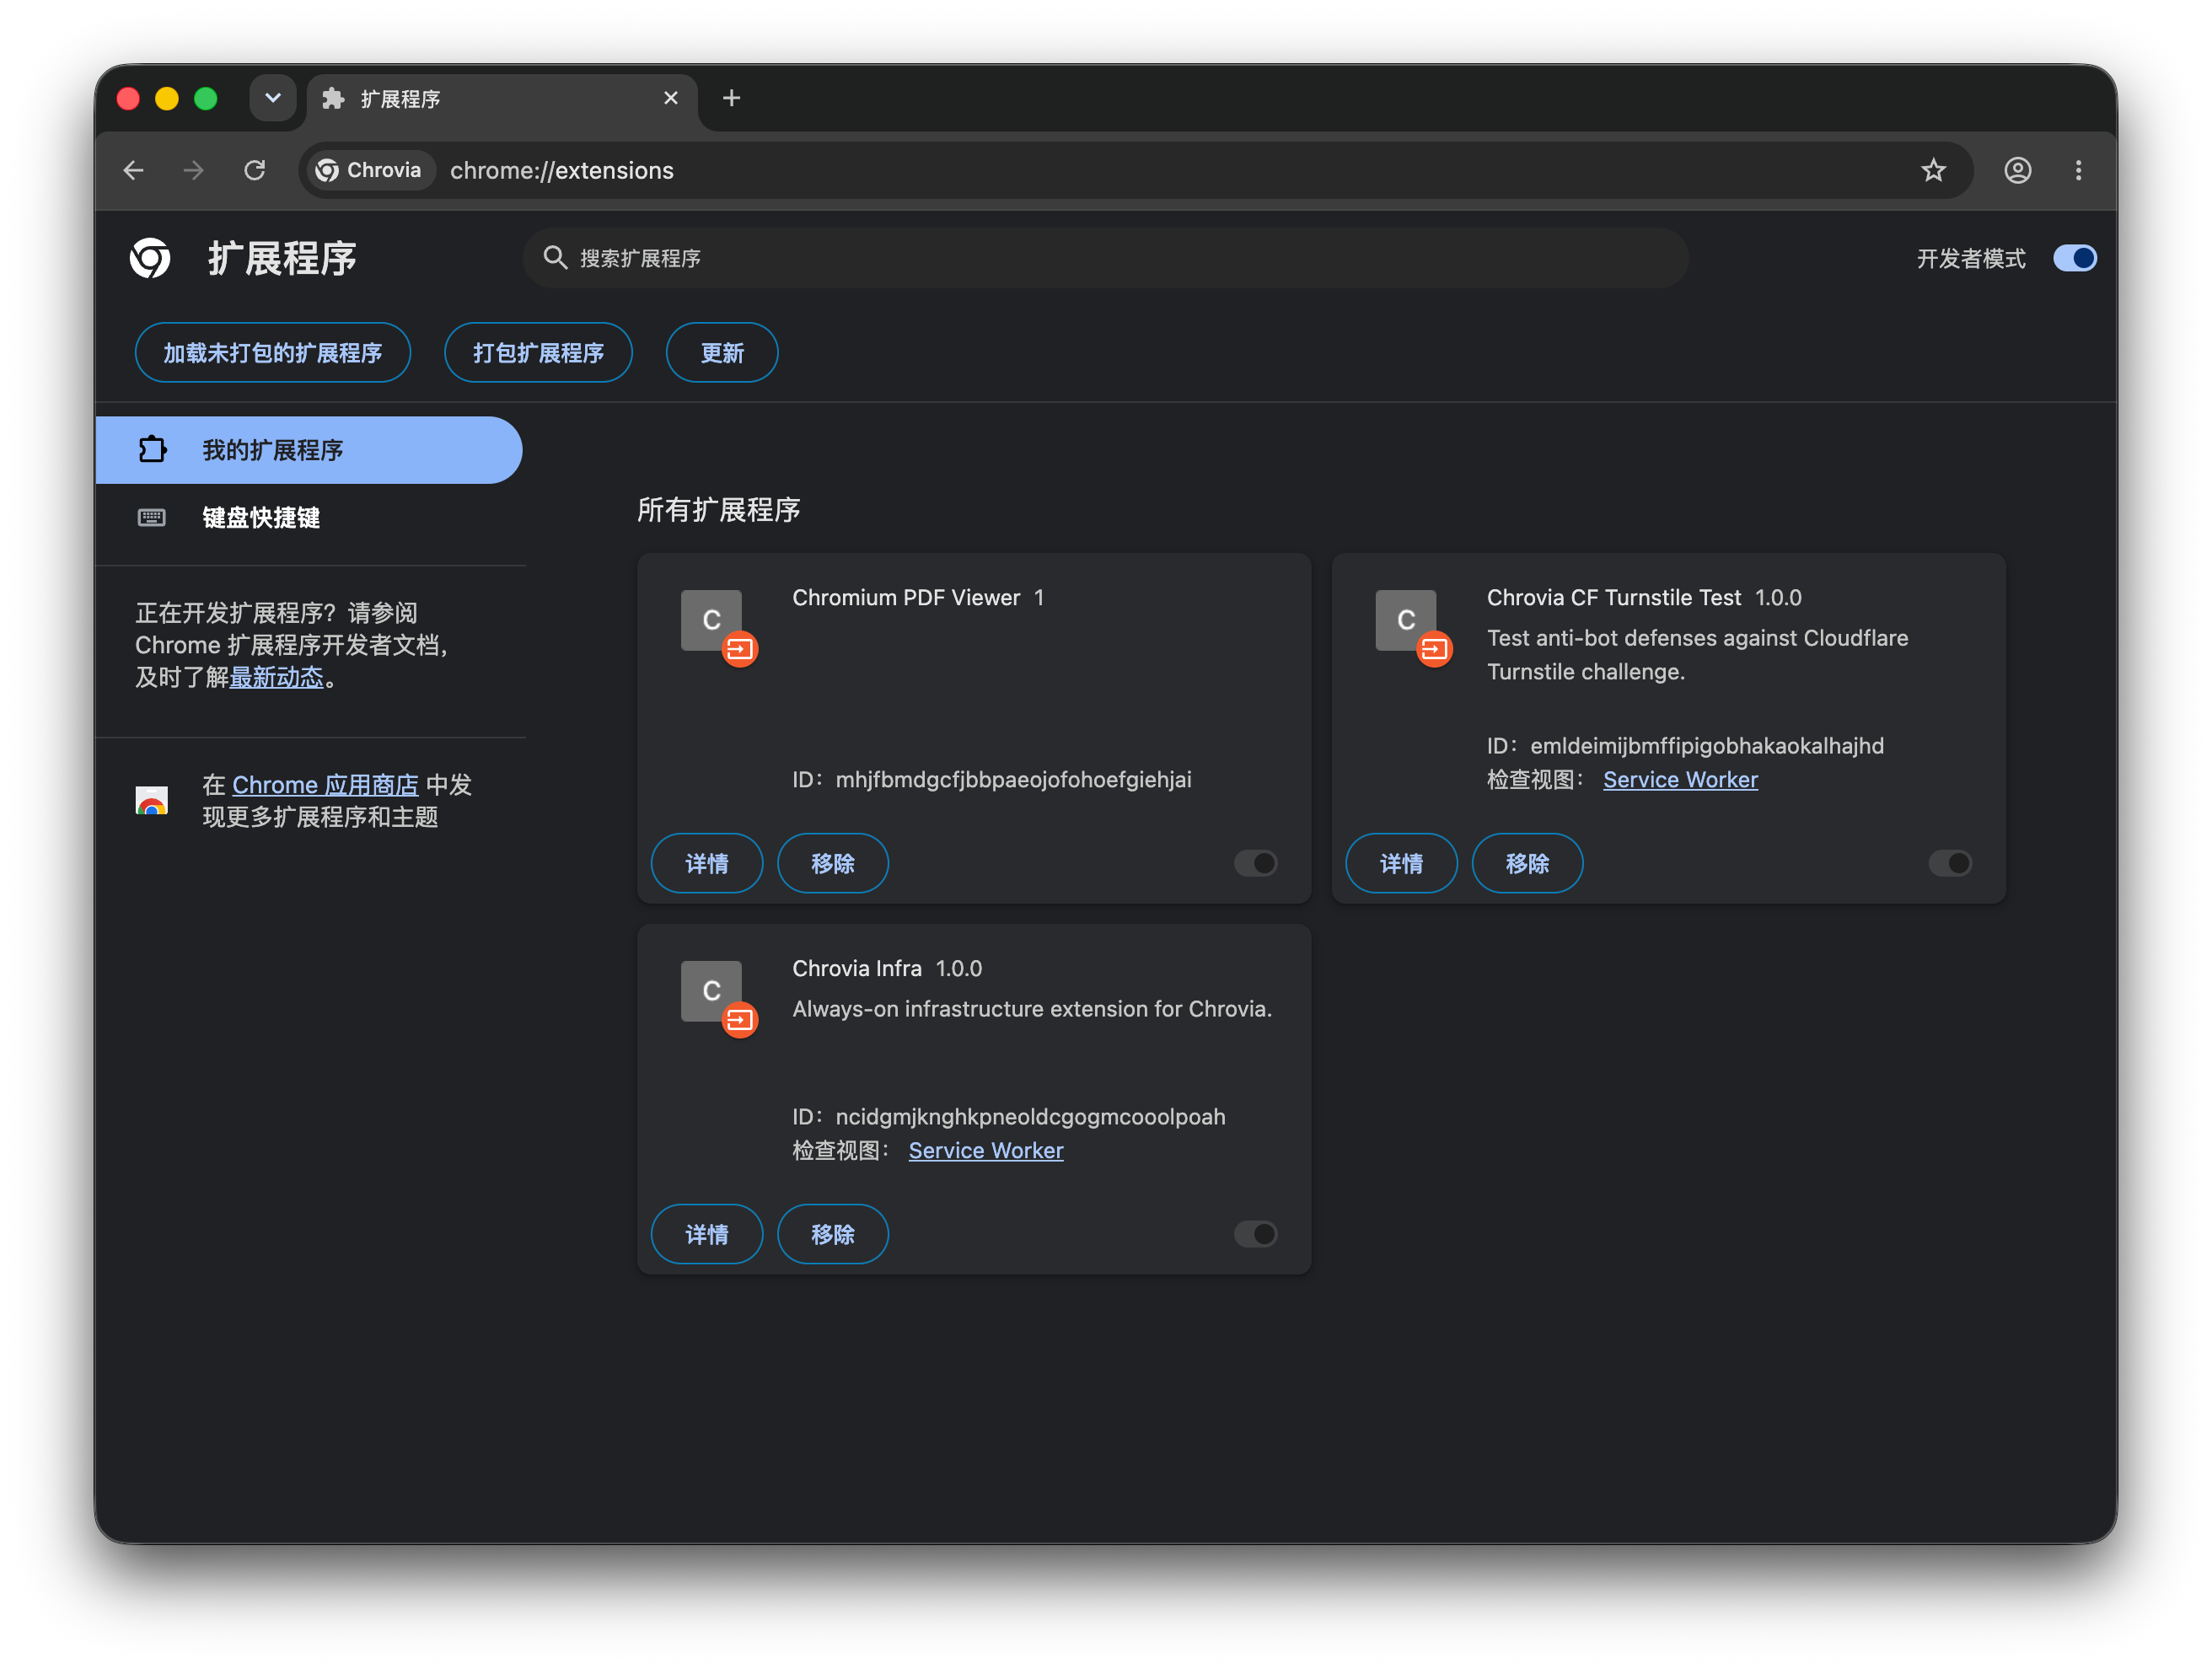
The License file is not an extension. Do not use Load unpacked to install it.
6. Confirm that the License is working
Find Chrovia Infra and click Service Worker next to Inspect views on its card. This opens DevTools for that extension.
Select the Console tab and enter:
chrovia.networkExpand the returned object to inspect methods such as intercept and stopIntercepting on its prototype, as shown below.
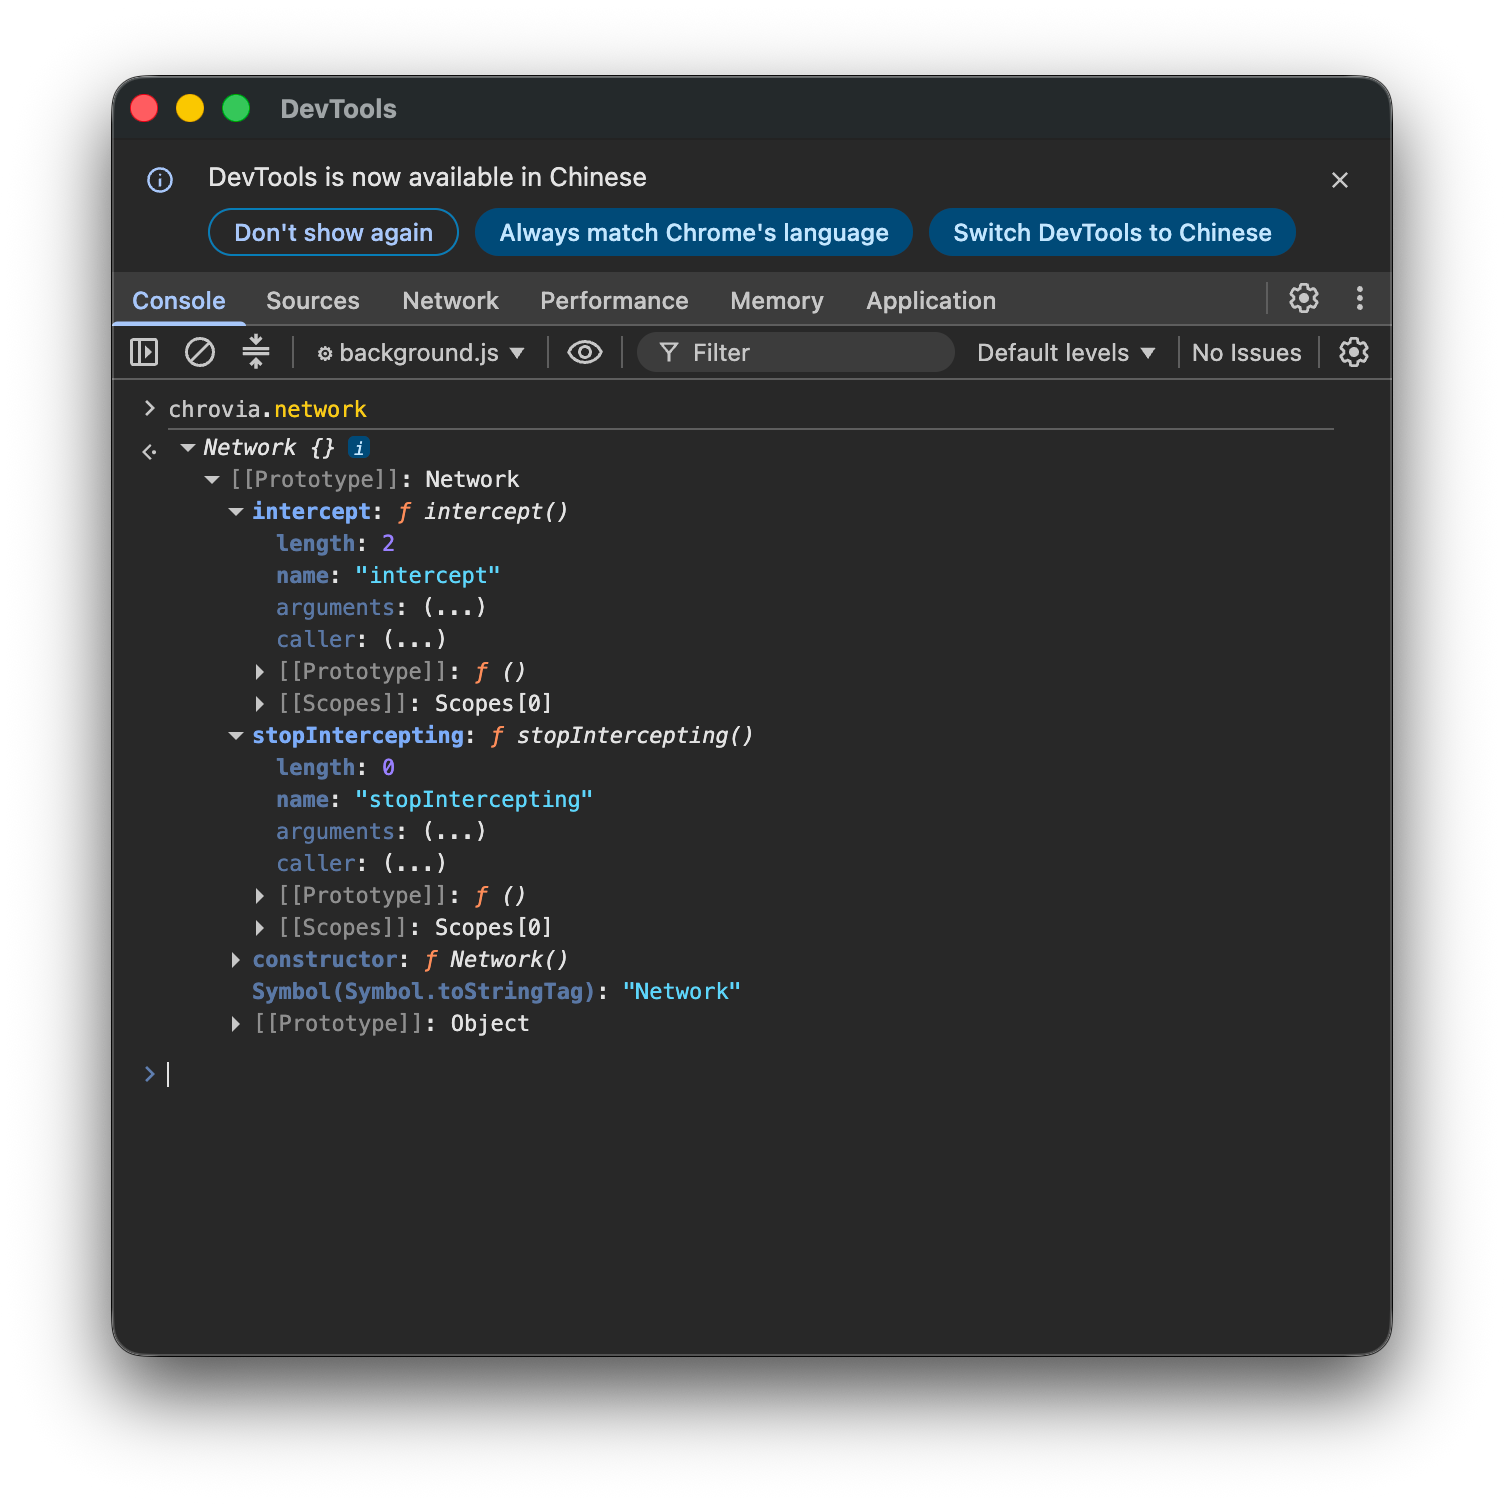
This is the console for a bundled Provision extension, not DevTools for a regular web page. Chrovia's privileged APIs are available to Provision extensions, not to arbitrary websites.
If the console returns Network {} with methods such as intercept and stopIntercepting on its prototype, as shown in the screenshot, the loaded License grants Network Intercept. chrovia.network returns an object only when the corresponding entitlement was loaded; otherwise, it returns undefined. This does not confirm successful lease renewal or current online authorization: the object can remain available after online authorization fails. See online lease diagnostics for that check.
If it returns undefined, first confirm that Network Intercept was selected when creating the License. Then check the License file's location, expiration date, and supported operating systems. Fully quit and relaunch the browser before checking again. This check verifies capability availability without starting network interception.
Troubleshooting
- License not found: check the folder and filename. Remove any extra
.txt,.json, or download number from the name. - Invalid license: confirm in Console that the installed license is active, has not expired, and includes your operating system. Do not edit the signed file's contents.
- Online authorization fails or quota runs out: check that the computer can reach Chrovia Console, then review the license status and remaining hours on its card.
- Bundled extensions are missing: confirm the archive was fully extracted and the
Extensionsfolder is still present. Fully quit the browser and relaunch with the flag above. - No `chrovia` object on a web page: use the bundled extension's Service Worker console, not the page console.
Fully quit and relaunch the browser after installing or replacing a License. Continue with the SDK developer quickstart to create your own Provision extension. If you want to manage Persona Hub identities rather than develop browser extensions directly, see how to create a Profile.